
Don’t be so pessimistic Scotty. Besides Scanners are not Negative, I just don’t have one that is as high resolution as I want.
Anyone under 30yrs old just stop reading here… This is about film negative and Slides…
What is film? You say.
Think of it like the vinyl records of photography. It is what we used before digital and way before phone cameras even existed. You know warmer colours and all that…
OKAY, for the two people that read this blog well really for the one person that did not just stop reading. Here we go.
If you’re like me you started with film and maybe just maybe there is a couple of shots in that box in the back of the cupboard, that may be worth digitising. Not THOSE pictures… perv….
Like me, you went to the camera store and looked at a few bespoke slide/negative scanners and decided that the 5 mega-pixels and the cost is not worth the low end of the market. So, then you looked at professional scanners and decided that the 12 mega-pixels was adequate until you looked at the time per scan. Not so great… Then you looked at how much it will cost, you turned pale and steadied yourself on the furniture.
After being released from A&E, you called your local pro-lab and got a quote…dear god… suddenly all those slides and negatives just seemed so much less important.
Well I there is an option, and it might even be free (depending on what equipment you have.). This will read like a recipe:
The ingredients list:
- Mobile phone, or tablet – search your app store for a lightbox app (and yes install it).
- (or an actual lightbox this is better but mine went with my enlarger and the dodo…
- Camera (DSLR or Mirrorless)
- Macro lens.
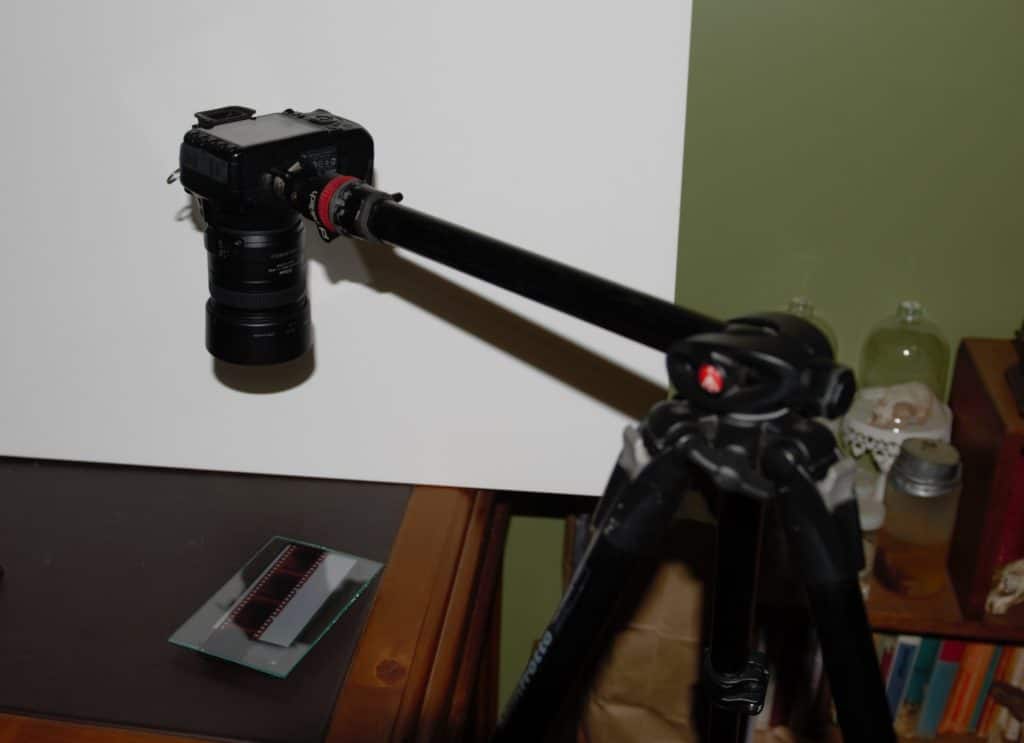
- Tripod if you have one with a 90-degree parallel arm PERFECT if not you can still get it to work just a bit fiddler.
- Piece of glass or two or even better a negative holder.
- Remote trigger (or you can use your timer)
- Editing software (lightroom is my recommendation)
That is all you need
Step one: Set up your phone/tablet/lightbox so that is can sit perfectly flat (e.g. remove from any covers), now set up your tripod or copy stand so that your camera is perfectly parallel to your phone/tablet/lightbox. This is the most important part everything must be square, and parallel if not parts of your scan will be burry.
The height or the tripod will be determined by lens.
Pre-set things up so that you can focus on an area of 24mm x 36mm, (a 35mm negative frame is about 23mm x 35mm.) or standard 35mm slide in a 2″ x 2″ mount) is usually about 34mm x 23mm, although it does vary a tiny by manufacturer and slide age.
Up to you if you want to crop things a bit later or be perfect now. (I vote for a bit of both, try to get it perfect but with a little crop room).
Manually focus. For this and only this, I use Live view (rear screen view) and the digital zoom feature.
(for those who have used an enlarger think of it as an enlarger focusing loop or magnifier)
Set the aperture to about f:8 or 9 and I use aperture priority so shutter speed changes with negative.
ISO at 100 or 200 to lessen as much noise as possible.
The remote trigger in or timer set to 10seconds
Now select your slide/negative to scan, clean it, and clean it again…
Clean your glass, rinse and repeat. (Dust blows….)
Keeping your slide/negative as clean as possible, place it in the negative holder or between your phone and the piece of glass or between the two pieces of glass. The goal here is to make it perfectly flat. If it is not perfectly flat, you will cause parts of your slide/negative to be out of focus.
If you want good colours you must shoot in RAW. By shooting RAW with your DSLR film scanning setup, you’re able to capture the colours and tones in your negative so that it is easier to manipulate during conversion. This is important because to convert your negatives into colour-corrected positives, we need all the editing power we can get.
With the lightbox on and you standing a few feet away TAKE A PHOTO. CLICK!
That’s it. If you were careful with your set-up you now have a high-resolution digital copy of your negative/slide.
Part two: Processing
Import into Lightroom
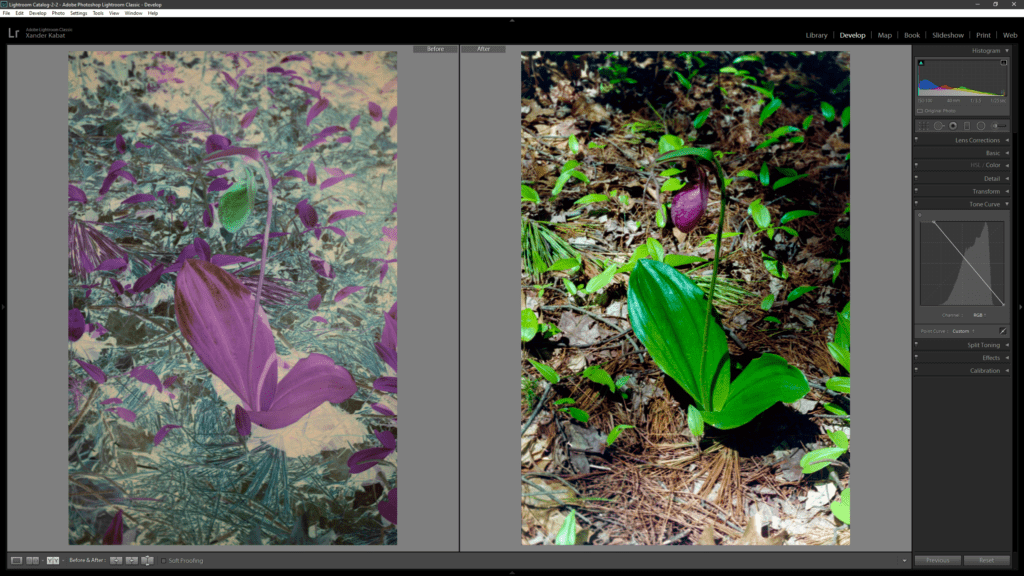
Slides should work like any other photo you have taken. Process as normal.
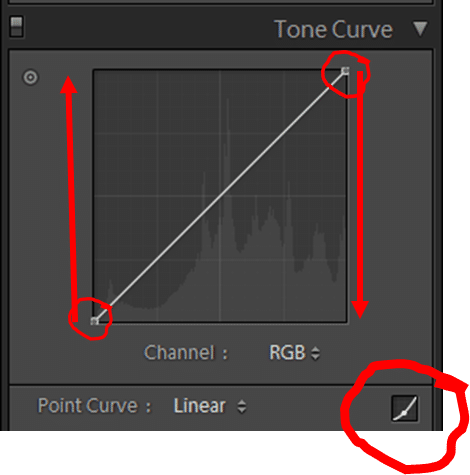
Negative will (obviously be negative). Lightroom has no option to invert photos but using an easy trick with the Tone Curve, you can invert any photos you like! This is great invert your /film/scans back to their original colours. (can also be used to give your photos an x-ray look)
Select the photo then go into the Develop module.
Step 2
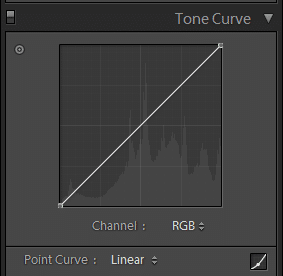
Go into the Tone Curve area in the Develop module.
Step 3
All you need to do is invert the tone curve! Click on the small curve icon – bottom right of the curve tool – and the behaviour of the curve changes. Also, the sliders of the curve tool disappear. Drag the bottom left point of the curve to the top left. (Hold down the Shift key to make dragging easier.) Drag the top right point of the curve to the bottom right.
Processing the image
- Setting the white balance is vital.
- Using the black of the strip itself is a great place to start – Each photo will need to be adjusted individually
- Once inverted all the colour, exposure and tonal settings are inverted too. So, editing black will edit the whites, increasing exposure will make it darker.
- A workaround is that you can “round-trip the file”.
- Import the negative image.
- Apply the “inverse” tone curve described below.
- Export the file as a TIFF or DNG.
- Then, re-import that image and you can continue to edit the exported “positive” image inside Lightroom as normal. (This may sound like a lot of work but if you use any pre-sets it is the only way)
- A workaround is that you can “round-trip the file”.
- When colour balancing removing a lot of blue is the best place to start.
There are lots of editing tutorials online about getting the colours right so I won’t talk about that here, Just remember to do everything backwards unless you used the workaround.
UPDATE: 27/03/2020
I HAVE UPLOADED But stay tuned I will be uploading a free LR preset for One-click, inversion, on my Photography Resources and Downloads page.
GOOD LUCK AND ENJOY.
There is also a commercial plugin called Negative Lab Pro: https://www.negativelabpro.com, I have not used it but it does have good reviews. *I am about to download the trial. But at $100.00 the manual inversion does not seem that hard for the number of images I need to do.