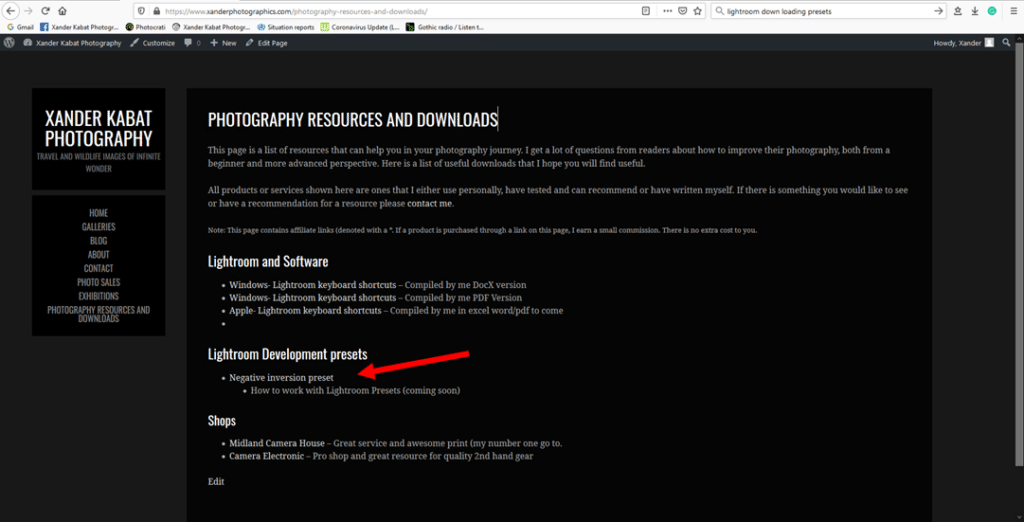
STEP ONE: Download your
preset. If you are doing this through my
site, it is a simple matter of clicking the link.
This is how it looks when the dialogue box opens…
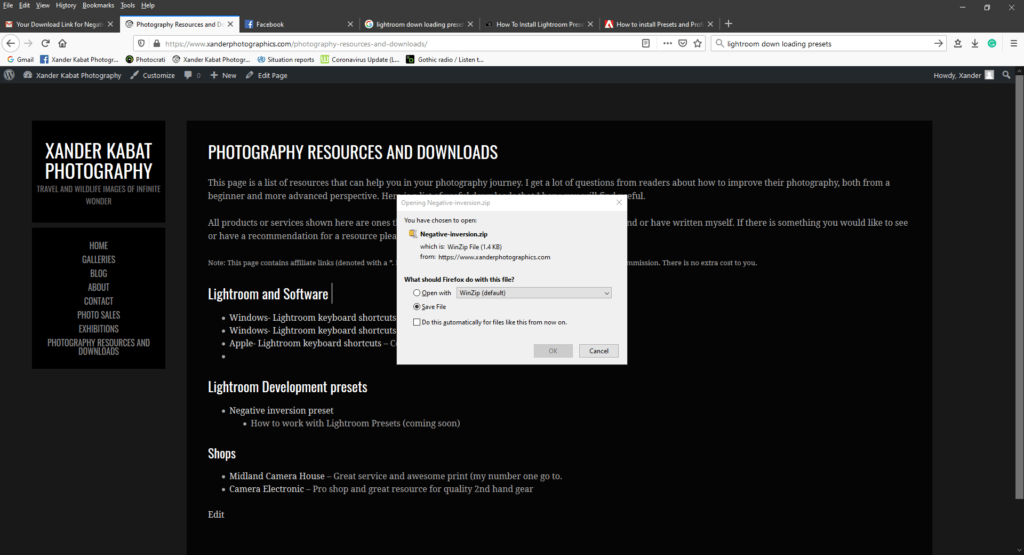
STEP TWO: Save the ZIP file on your computer in a temporary or downloads location.
STEP THREE:
3.1 Unzip the file (I like to use 7-Zip https://www.7-zip.org/ Download anything from the internet at your own risk).
It is best to “unzip” it to the Adobe Preferences Preset location. This keeps everything in the same spot and makes finding it later easier.
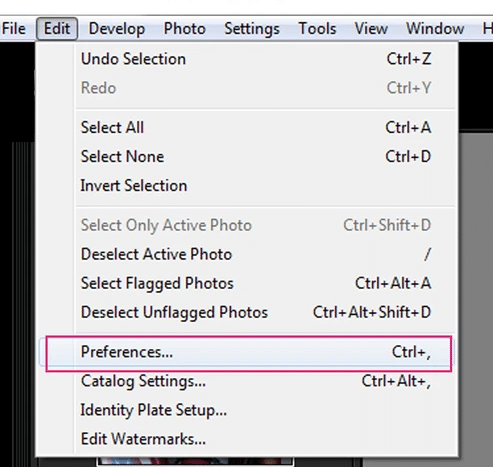
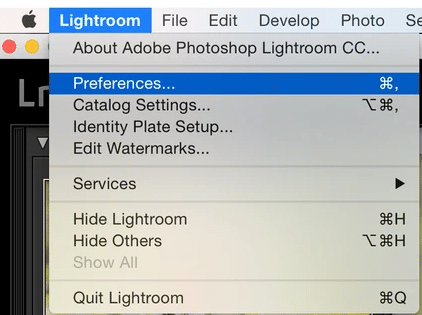
To find this location on a PC, “Preferences” is under the Lightroom “Edit” menu. On a Mac, you will find it under the “Lightroom” menu. It looks like this…
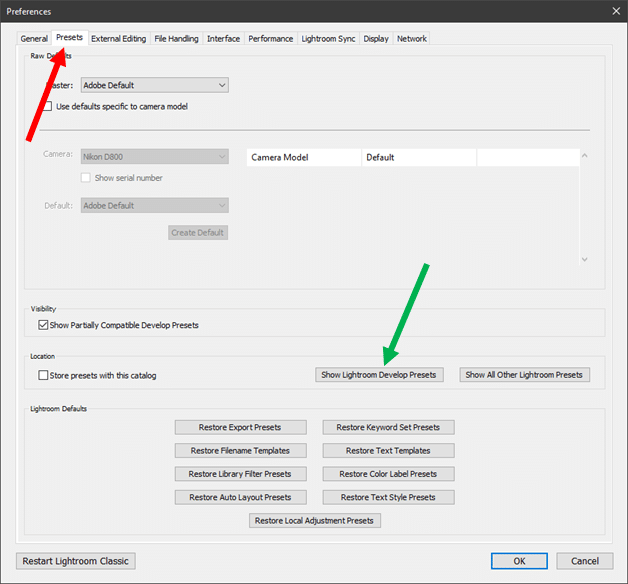
3.2 Once you are in “Preferences”, click on the “Presets” tab (red arrow). In that window, click on the “Show Lightroom Development Presets” button (green arrow). This will take you to where your version of Lightroom keeps your “Settings” Folder.
3.3 In the new window, open the “Settings” folder.
3.4 Open the “User Presets” folder.
3.5 Save your unzipped preset in the “User Presets” folder.
3.6 Delete the ZIP file. You do not need to keep a copy.
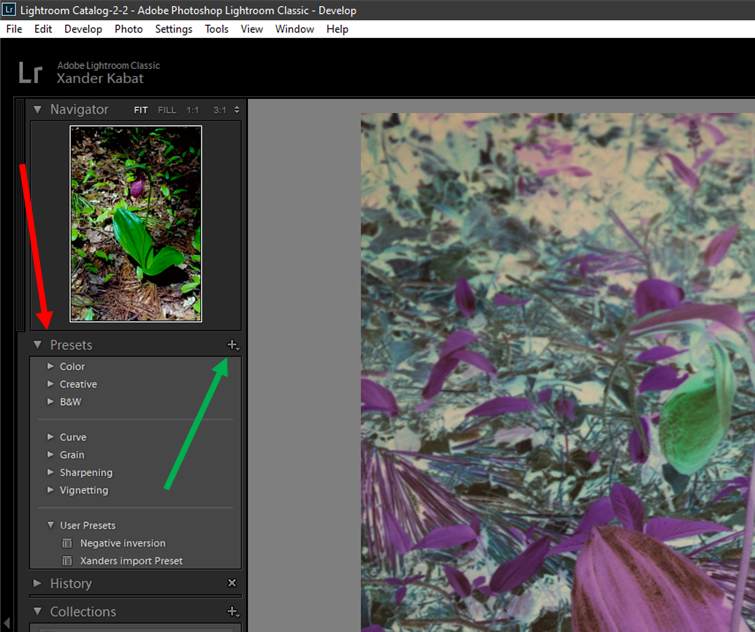
STEP FOUR: You can now install Lightroom presets straight from the Presets dialogue when you are in the Develop Module in Lightroom.
- Open Adobe Lightroom.
- Navigate to the Develop Module.
- On the left sidebar, find “Presets” tab (red arrow).
- Click the “+” icon next to the “Presets” title (green arrow).
- Select “Import Preset”.
- Navigate to your “User Presets” folder from step 3.5.
- Select the preset files and there you have it, you can use the preset!